


Are you looking for a new knitting project to keep you warm and cozy during the winter months? If so, learning how to knit a woolen beanie with two needles is a great way to begin! You don’t need to have previous knitting experience, and this step-by-step tutorial will guide you through the process. It’s a fun and easy project that can be completed in no time!
MATERIALS NEEDED TO KNIT YOUR BEANIE
- 1 skein of Casasol Amour Single Ply (100% Lambswool) 100 gr = 85 m. Bulky weight. Color Rose Gold.
- 7 mm. straight knitting needles (or the size needed to get the gauge).
- Scissors
- Tapestry needle
- Pencil
- Pompón

Gauge
10 x 10 cm = 14 stitches x 19 rows in stockinette stitch
It is very important to knit the tension sample to check that it corresponds to the pattern, so you will get the desired measurements.
Techniques, points and abbreviations
- Cast on
- Knit stitch (k)
- Purl stitch (p)
- Wrap Stitch
- Knit two stitches together (k2tog)
- Purl two purl stitches together (p2tog)
- Invisible seam
How to knit a woolen beanie: Step by step
Knit the cuff
Take your ball of yarn and draw approximately the length equivalent to the base of the hat times three, in this case it would be a meter and a half.

Cast on 66 stitches on your needle and knit 12 rows in 2 x 2 Ribbing stitch.

To facilitate the subsequent sewing of the two ends of the fabric to form the cap, I recommend that you always slip the first stitch as it appears.
Knit the base of wrap stitches
Once you have knitted the cuff, we are going to start knitting the base of the hat, forming the Wrap Stitches pattern.
You can learn how to knit this stitch in the DOTTIE wool hat video tutorial.
Work the next row in the following way:
Row 13 (Type 1): k 2, p 2, * Wrap Stitch, p 2, k 2, p 2 *. repeat from *to* until the end of the row, ending with k 2.

Work the next 5 rows (from 14 to 18) in 2×2 Ribbing Stitch.
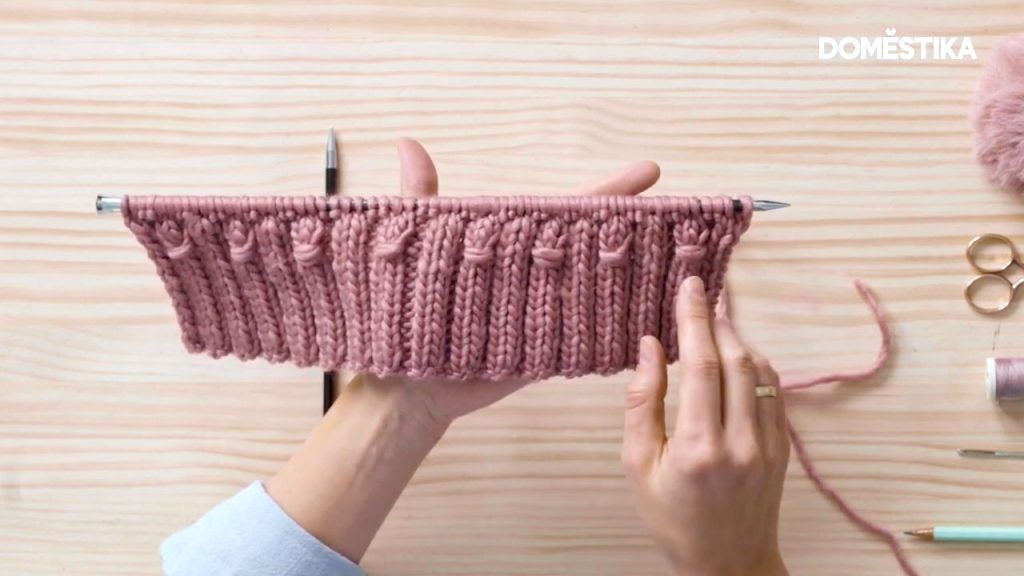
Knit the next row as follows:
Row 19 (Type 2): k 2, p 2, k 2, p 2, * Wrap Stitch, p 2, k 2, p 2 *, repeat from *to* until the end of the row, ending with k 2.
To form the entire base, you will alternate 5 rows of 2×2 Ribbing Stitch, 1 row of Wrap Stitches Type 1, 5 rows of 2×2 Ribbing Stitch, and 1 row of Wrap Stitches Type 2. Work in this manner until you have completed a total of 6 rows of Wrap Stitches.

Knit the descreases for the top
Now that we have the base of the hat ready, it’s time to work some decreases for the closure of the hat.
To do this, on the next right side row work: *k2tog, p2tog*, and repeat from *to* until the end of the row. At the end you will have decreased to 33 stitches on your needle.

Close the top of the Wool Cap
Cut the yarn, making sure it is long enough to sew the side seam.
Insert the thread into a tapestry needle and slip each stitch onto the needle. Once all the stitches have been passed, gently pull the yarn through and secure it so that it is wrapped around the top of the hat and will not come loose.

Final touches
With the same yarn, join the two sides of the cap with an invisible seam and weave in the loose ends.

Finally, sew a pompom to your hat and you’re done!


Download the wool hat pattern
To make it even more convenient for you to knit your own wool hat, you can download the pattern in PDF format by clicking here. Within the document, you will discover detailed step-by-step instructions, stitch-by-stitch guidance, and a stitch diagram of the hat. This visual aid will facilitate a clearer understanding of the design as you proceed with your knitting project.
This DOTTIE wool hat tutorial is included in the content I’ve created for my second Domestika course, “Knitting Children’s Garments with Raglan from Top to Bottom.” If you’re eager to refine your two-needle knitting skills and acquire techniques for crafting a versatile children’s sweater that can be adapted into various garments, allowing for customization according to your preferences, this course is a must-attend!
I hope you thoroughly enjoyed this post and are brimming with inspiration to embark on your next project. If you found the DOTTIE beanie appealing, I encourage you to share your experiences and accomplishments with us on social media. I would love to see your interpretation! Remember to use the hashtags #creativaatelier and #DOTTIEhat so that we can all admire and celebrate your creation together. 💖🧶
¡Besos!

 ITSY-BITSY Crochet Cardigan – Pattern & Tutorial