


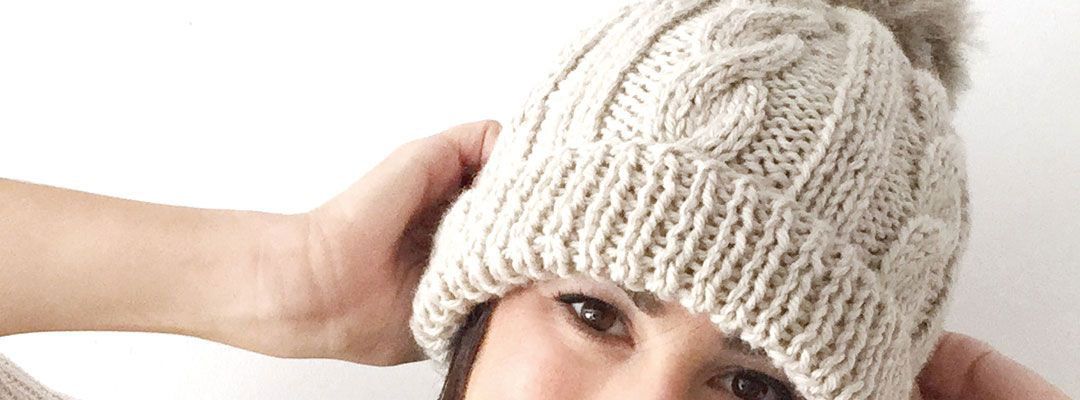
For the days of cold that are to come, I propose to you knitting a cable wool beanie with a pompom made out of imitation fur, a must have in your winter’s closet. To be honest I can’t think of a more winterly combination than thick wool of a natural color, eights knitted and furn. This easy knit wool hat will be an allied to keep the cold on a leash in the coldest months.
This is a very easy cable beanie knitting pattern that you can knit without need of knowing how to knit with circular needles or having vast knowledge of knitting.
Materials to make a Cable Wool Beanie
- 2 balls of wool of 100 gr. for 5,5 or 6 mm. needles (9″ or 10″) Keep in mind that we’ll only use half of the second ball. About the yarn you see in this project, it’s from Lanas Stop in the style Top Merino in the color 709. I love this beige close to stone color.
- 5,5,mm. Straight needles (9″). As you see in the pictures I’ve used circular needles because, for me, it’s more comfortable, but I use them as if they were straight turning it around every time I finish a row. If you haven’t tried knitting with this type of needle, I recommend it. At first, it can take time getting used to them, because they’re shorter, but whenever I can use them I do because I find it more comfortable having the fabric in between the two needles, mostly when leaving a project unfinished so you don’t have the needles laying around. Also they’re very useful when working with a lot of stitches because it can hold more than what a straight needle would (for example, a baby’s jersey, when you have on the needle the two sleeves and the back).
- A pompom or fuzzy wool
Required Knitting stitches and techniques
How to make a cable knit wool beanie step by step
1. Knit the headband of the Cabled Beanie
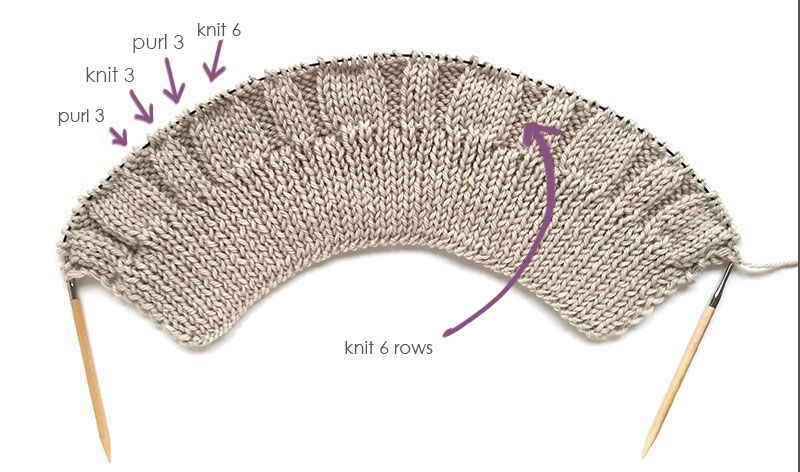
First, when calculating how many stitches we need, we have to think the cable pattern we will do. In this case, the pattern we will follow will be: purl 3 stitches, knit 6 stitches, purl 3 stitches, knit 3 stitches and this sequence will be repeated until the end of every odd row, so the stitches will have to be multiples of 15 plus 1 stitch that we will add always for the edge. For an adult size and using this specific yarn and 5,5 mm. (9″) needles you have to cast on 91 stitches. To make smaller sizes you can cast on 76 or 61 stitches.
The first 14 rows will create the headband of your beanie. You’ll knit these rows in a different pattern from the rest of the hat. These rows will follow a k1, p1 pattern, this means that you will knit 1 stitch, then purl 1 stitch for the entire row of 91 stitches.

2. Start knitting the cables of our wooly hat
Once the 14 rows or 7 cm. (2, 75 inches) are knitted, we will start knitting the rope cable pattern. As mentioned before, the sequence will be purl 3 stitches, knit 6 stitches, purl 3 stitches, knit 3 stitches until the end the row. Once every row is finished, we will turn around it and knit the stitches as we seem them, meaning if we see stockinette stitch stitch we knit and if we see a garter stitch we purl.
Odd Rows (1,3,5): p3, k6, p3, k3 and repeat all way across
Even Rows (2,4,6): k3, p6, k3, p3 and repeat all way across
How to knit cable stitch
When we reach the row nº 7, we’ll continue knitting following the pattern described above until we reach the 6 stitches knitted in stockinette stitch. That is the time to start working the turning row like this:


Keep in mind that, even though I have kept the stitches on a stitch holder or cable needle, if you don’t have one you can also do it with a safety pin, another needle or even a toothpick if needed.
We will continue in the established pattern of alternating between garter and stockinette stitch and working the turning row every 6 rows for 42 rows (21 turns) or 21 cm. (8, 25 inches) approximately.

3. Close up your hand knit wool beanie
This is the moment to close the top of the wool hat and seam the sides together.
Thread the tail of the yarn through your tapestry needle and slip the needle into the stitches, pulling the free end of the yarn through the stitches. Pull the free tail to tighten up the end of the hat.

4. Add the Pom Pom to the knitted wool beanie
As you can see, the wooly hat is complete and you can leave it like this or add it a pompom made out of wool or, as shown, one made out of imitation fur, a material very versatile that can change into a thousand shapes and have a thousand uses.
To knit this imitation fur wool I’ve used 7 mm. (10, 5) needles to make it more squishy.

Done! The cable knit wool beanie is ready to wear or give away. I bet if you are an expert knitter you may be asking yourself “why haven’t I made the Cabled Beanie in just one round piece avoiding the seam if I have circular needles?”. Just because I have realized that knitting flat with two needles would be easier to do for beginners than knitting with circular needles. So whether you’re just beginner or a pro you can follow this hand knit wool hat tutorial without any trouble 🙂


I’m sure you’ll enjoy knitting it and I believe that those who haven’t move past the garter and stockinette stitch and only knits scarfs will now want to try the Cable Stitch, it’s easier than it looks!
By the way, for those of you who are low on budget this Christmas, how about giving away this wool beanie as a handmade gift? There’s no gift more special than one made by our own hands and that the receiver will most definitely love and appreciate.
If you have enjoyed this Wool Beanie pattern and tutorial and you find it useful , please pass the website address along to a friend and do not hesitate to share it or comment below.
Kisses,
Tutorial, pattern and images registered under a Creative Commons licence Creative Commons Attribution-NonCommercial-NoDerivatives 4.0 . Gorro de lana de ochos con Pom Pom – Tutorial y Patrón – CC by-nc-nd 4.0 – Marta Porcel
This pattern is for personal use only. Please do not claim this pattern as your own, or sell or distribute it. If you would like to share this pattern, please link to this site and do not repost the pattern on your site. You can sell finished items made from this pattern, but please link back and give credit to Creativa Atelier. Please, respect designers and their Intellectual Property. Thanks!
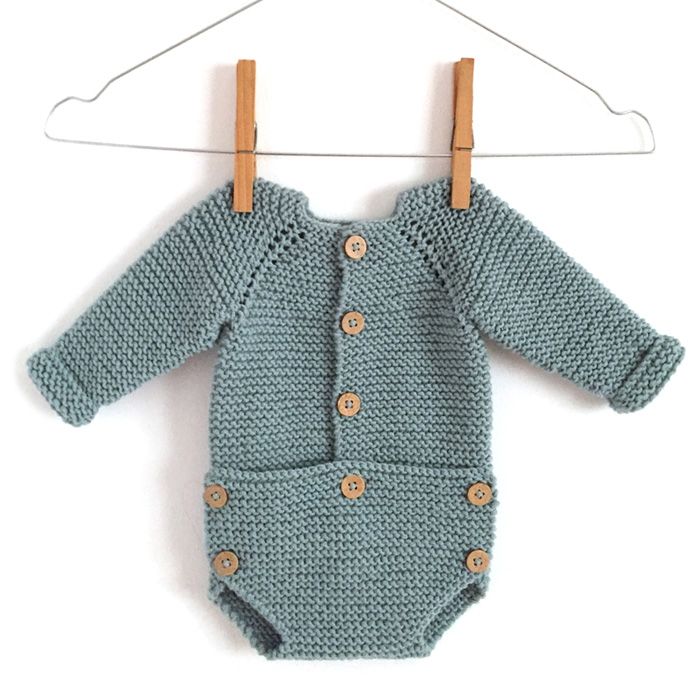 Knitted Onesie – Musgo Baby Pattern & Tutorial –
I read your blog . Really its amazing. The way of explanation is really good. It is very informative how to prepare handmade woolen cap. Fabulous blog.
I always get confused with forward or backward cabling.
How do I know if I should hold the stitches at the back or in the front.
Everything else is good, I love the pattern.
What is the gauge? Sorry if it’s there but I don’t see it. Thank you!
Great pattern and pictures. I’m sorry. But how can I print this pattern. Did I miss the link? Thank you
Hello can you please tell me did you knit the rib on size 5.5 or did you use a smaller needle size.
I just finished knitting this hat and it turned out beautiful, love the pattern and it was easy with the added tutorial
thanks for this beautiful pattern..do you perhaps have a video on making this beanie
do we alternate the cable stitch after each 6 rows by done one cable in the back and then the next in the front
A beautiful pattern will definitely be giving it a try. Thank you so much for sharing.
Thelma
Love the tutorial. Love the beanie. Have sent my husband shopping for a 9” circular needle. Can manage to combine knitting and chemotherapy. Very therapeutic and practical for hair loss. 🤗
Hi, I‘m a bit confused with counts of the stiches. I did not encounter any problem when doing the stockinette. But as I started doing the the cable pattern: p3, k6, p3, k3 I am puzzled because I have 1 stitch left. Based on the second image (the one below stockinette photo) I did count the stiches of your work. Here‘s the counting result: purl (3) 39 stitches, knit (3) 18 stitches knit (6 for cable) 36 stitches = 93 stitches. This means we have to add or increase 2 additional stitches to achieve what is shown on the photo I mentioned.
The pattern of the cable is repeated over 15 stitches so you have to 90 stitches (6 x15) to make the pattern repeat. On the first row of the cable pattern ONLY when you come to the last 4 stitches k1 k2tog k1 so you have decreased 1 stitch leaving you with 90 stitches. Do not decrease any more and you will have 90 stitches for the rest of the beanie.
Hope this helps.
Am I the only one who had trouble with this? My rows leading up to the cable were NOT looking like that!! 😞 does anybody have just the written out pattern without the explanation inbetween? I think that’s what’s confusing me!
Beware! The instructions are wrong. So far I’m only as far as Stage 2 knitting the cables (pre-cable) but what you want for the odd lines is NOT what is printed, it is :
p4 k3 p6 k3. As a new knitter, I faithfully followed the instructions and unsurprisingly ended up with a mismatched mess, which I then had to time-consumingly take back down to the rib. The error was obvious when I knew to look and I will be pre-thinking the rest of the pattern carefully, and updating with any other incorrect instructions.
I too found the instructions once getting to the odd row was wrong. I had to give up altogether and now I’m crocheting. I really wanted to work this pattern. Updating instructions would be great.
This has to be the best pattern instruction I’ve ever read! Thank you so much for that and the great. number of lovely clear, in-focus photos.
If only other people would follow your example, check their instructions are correct and supply great photos.
I know many patterns are freely given but we still need them to be accurate!
I knit for charity and this pattern will be used with great pleasure. Thank you so much!
How can I increase the size of your baby jacket pattern to 24months? Any help would be much appreciated as I just love this pattern.
Becky
Love the straight knit cable hat. Only just learned cable knit and I am hooked on it already!!!
Thank you for thinking of us straight needle knitters, I for one will certainly use this pattern that you have graciously given us.
What is the gauge of the yarn used in your pattern?
I would like to have the written version of the cable hat. thanks
I do not understand how to make the pompom Do you have a tutorial. I love that hat and will make it soon.