


It is clear that vests are the garment of the year, so I couldn´t fail to knit my own version. Today I´ll show you the DUO Reversible Knitted Vest, which you can use indistinctly on one side or the other as you wish; both sides are beautiful! 😉.
In today’s free tutorial, I’ll show you how to knit the flat version of the easy knitted vest, but if you like to knit in the round, you can find the circular version in the PDF patterns. If you choose that version, you will avoid sewing the sides at the end.
The DUO Knitted Vest can be knitted both flat and in the round in a single piece that at the end, we will sew at the sides or shoulders to form its final shape.
If you decide to work flat, you will start by knitting the lower front area, then dividing your stitches and shaping one armhole, neckline, and shoulder. You will form the other side of the neckline and finish your knitting by joining the two shoulders at the back of the neck and knitting the back of the vest.
If you prefer to work in the round, you will start knitting from the bottom to the armhole, dividing the front and back stitches. You will first work the back, shaping the armholes and then, work the front of the vest, shaping the armholes, neckline, and shoulders. Once finished, you will join back and front with an invisible seam.
Finally, you will return your stitches on hold from the neck to your working needle and knit the back band in both cases.
Available sizes of the DUO Reversible Knit Vest
In today’s tutorial I show you how to knit a size S. This is the size that you can see in the photos at the end of the post, but this same model is also available in sizes M, L and XL.
Whether you need a different size besides the one in the tutorial, find it easier to knit with detailed instructions row by row, and stitch by stitch, or you choose to knit in the round to avoid seams sides, you have the downloadable and printable PDF pattern at a hand! Click on this link or in the following image to choose your size!

To know what size you need, you only have to know your chest contour and decide if you prefer it tighter or looser.
Size S. Bust circumference between 82-90 cm. + 10 cm. of positive ease (Bust circumference of the finished garment 100 cm.)
Size M. Bust circumference between 90-98 cm + 10 cm. of positive ease (Bust circumference of the finished garment 108 cm.)
Size L. Bust circumference between 98-105 cm + 10 cm. of positive ease (Bust circumference of the finished garment 115 cm.)
Size XL. Bust circumference between 105-115 cm + 5 cm. of positive ease (Bust circumference of the finished garment 120 cm.)
As in all my patterns, you have the option to buy separately one size, or get the 4 sizes of the pattern available at a great discount. Click here to get the 4 sizes of the DUO Knit Vest.
The PDF pattern gives you some extra advantages that will make knitting much easier

Downloadable pattern
You can download your pattern and use it whenever you need it without depending on the mobile connection.

Ready to Print
You can print it to always have it by your side while you knit and do annotations, track marks , etc…

Detailed row by row directions
And stitch by stitch! This way, you don’t have to bother doing the math yourself.

CIRCULAR and flat directions
Version for both, circular and flat knitting available in the PDF Pattern.
Materials to make the DUO Knitted Vest
- 6 skeins of Cotton Merino Concept by Katia (50 gr = 105 m). Color 106 Light Grey
- 5 mm knitting needles
- 2 stitch holders
- Tapestry needle
Gauge
17 stitches x 24 rows in Stockinette Stitch after blocking = 10 x 10 cm.
Knitting stitches and techniques / Abbreviations
- Cast on
- Knit stitch (k)
- Purl Stitch (p)
- Ribbing Stitch (Rib)
- Slip 1 Knit 1 Pass Slip Stitch Over (s1k1psso)
- Knit 2 stitches together (k2tog)
- Purl 2 stitches together (p2tog)
- Make 1 Right (M1R)
- Make 1 left (M1L)
- Bind off
- Vertical invisible seam
- Horizontal invisible seam -Kitchener Stitch
How to knit a Reversible Knit Vest with two needles – DUO Vest Size S
It is very important to notice that in this pattern, on even rows, we will work stitches as they appear, that is, knit the knit stitches and purl the purl stitches, unless it is expressly stated in the text.
Work the Front
Knit the hem and front body
Cast in 95 stitches and knit 16 rows in 1 × 1 Ribbed stitch. To form this type of stitch you should work odd rows alternating *k1, p1*. On the even-numbered rows, as I mentioned before, knit the stitches as they appear, that is, *p1 , k1* until the end.

Once the hem of the knitted vest is completed, you should work row 17 and following odd rows until 87, Rib 8 (Ribbed Stitch), k31, Rib 17, k31, Rib 8 .
Work even rows stitches as they appear.

Shape the armhole and the right neckline
From now on, we will begin to divide our stitches to shape the armholes and the V-neckline.
On the next purl row work: Rib 8, p31, Rib 8 knit sts, place these 47 stitches on hold onto a stitch holder. Then purl 2 stitches together (p2tog), Rib 7, p31, Rib 8.
From now on we will only work the stitches on the right shoulder of the vest.

To form the armhole and neckline at the same time, you must work decreasing 1 stitch in the odd rows in the armhole area and 1 stitch every 2 odd rows in the neckline area.
We are going to work these decreases beginning at 8 stitches from the edge of the work, that is, once you have worked 8 rib stitches, you must Slip 1 Knit 1 Pass Slip Stitch Over (s1k1psso) and when you have 10 stitches left to finish the row, you should knit 2 stitches together (k2tog) and then rib 8.
Row 89. Rib 8, s1k1psso, k27, k2tog, Rib 8
Row 91. Rib 8, s1k1psso, k27, Rib 8
Row 93. Rib 8, s1k1psso, k24, k2tog, Rib 8
Work this way until you have 35 stitches on your needle.

Once you get 35 stitches, you have finished decreasing to form the armhole of the Knitted Vest, but you should continue decreasing every two odd rows to shape the neckline until you obtain 26 stitches.

Work the right front shoulder
To finish the right shoulder, we will give it a little more height by knitting 11 more rows without decreases. Remember that you must work the first and last 8 stitches in Ribbed Stitch.
When finished, place all the stitches onto a Stitch Holder.


Remember that if you find it easier to knit with all the instructions for each row and every stitch, you can acquire your pdf pattern in the tutorial’s size for only 2.99€ or any of the other sizes available for 3.99€.
Shape the armhole, neckline and left shoulder
Once the first armhole, neckline and shoulder are formed, we are going to place the reserved stitches for the other armhole into our working needle.
You must work the same way; decreasing 1 stitch in the odd rows in the armhole area and 1 stitch every 2 odd rows in the neckline area until obtaining 35 stitches, continue decreasing only every 2 odd rows in the neckline area until you end up with 26 stitches and finish knitting 11 more rows to give it height.

Work the Back of the Reversible Knit Vest
Join the two shoulders at the back of the neck.
Once you have all your front formed, it is time to join the two shoulders at the back of the neck to continue knitting the back of the Reversible Knitted Vest.
To do this, on an even row, work 8 rib sts, p10, place on hold into a stitch holder the next 8 rib sts without knitting. Cast on 43 stitches, place the stitches on hold from the other side of the neckline into the working needle, except for the 8 ribbed closest to the neckline that will remain on hold. Purl 10, rib 8.

Once this row is worked, you will end up with 79 stitches on your working needle and two stitch holders on both sides of the neckline with 8 stitches in each of them.
Work the upper back area
To form the upper back area, work these 79 stitches for 44 rows. You should continue to form the pattern by working odd rows: Rib 8, k23, Rib 17, k23, Rib 8. Work all the stitches as they appear on even rows.

Shape the armholes
When you reach the armhole area, work increasing 1 stitch on each side after the ribbing until you get 95 stitches.
I have chosen to use M1L and M1R increases. In the first row of increases, you should Rib 8, M1L, k23, Rib 17, k23, M1R, Rib 8.

Once your increases rows are finished, knit these 95 stitches for 72 more rows, keeping the pattern and finish with 16 more rows with a ribbed stitch. Bind off all the stitches.


Work to the neckband
Place the 8 stitches on hold from the back of the neck into your working needle and work 43 rows in Rib Stitch. Join these 8 stitches to the other 8 stitches on the stitch holder using a Kitchener Stitch.
If it is easier for you, instead of using this type of horizontal invisible seam, you can bind off the stitches and sew them as is most comfortable for you, make sure that this seam is as invisible as possible.


Once the two parts are joined, sew the neck to the base.
Final touches
Fold the garment at the shoulders and sew the sides with a vertical invisible until you reach the ribbed area, where we will leave a small opening.
It is very important that you focus on making this seam as invisible as possible and being homogeneous both inside and outside so that your Knit Vest can be reversible, and you can wear it on both sides.

Although if you do this seam well, the union will not be noticeable, if you decide to knit your DUO Vest in the round, you will save this step. Remember that the version for circular knitting is available in the PDF Pattern.
Weave in any loose ends.
Although blocking is not essential in this garment, to obtain even stitches and the best results, I advise you to immerse it in warm water, remove excess water with a towel and let it dry on a flat surface.


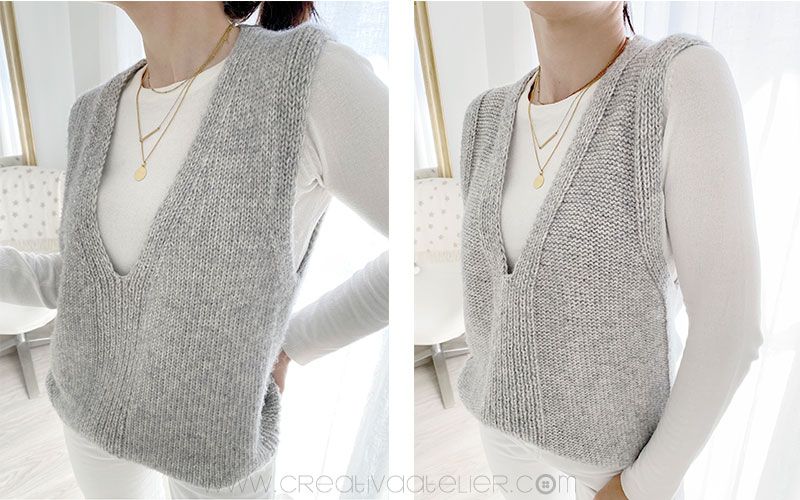


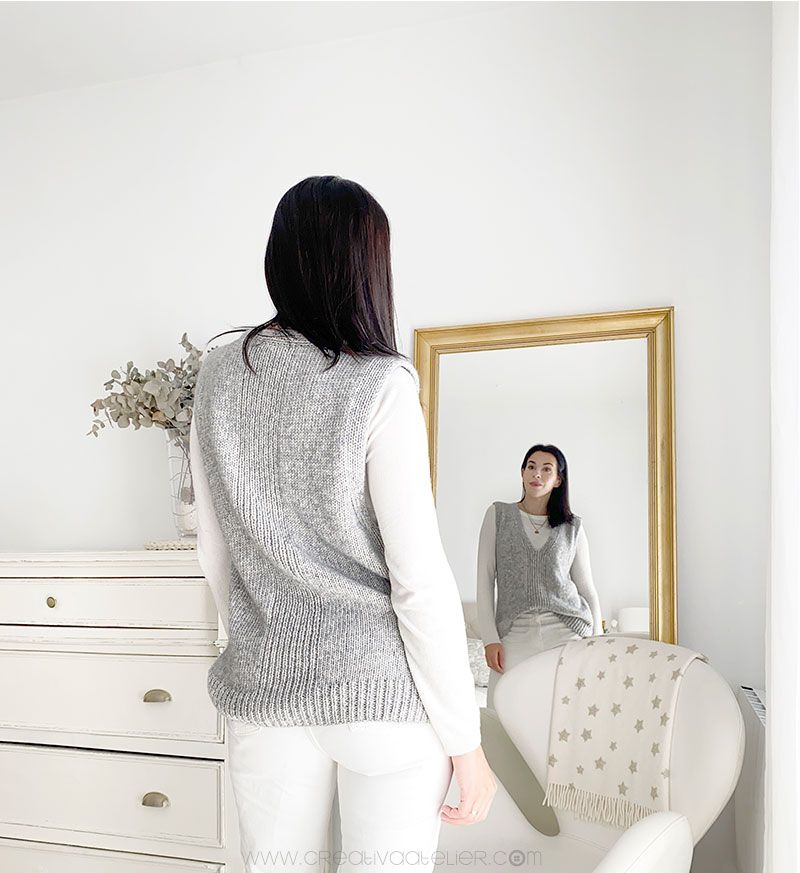
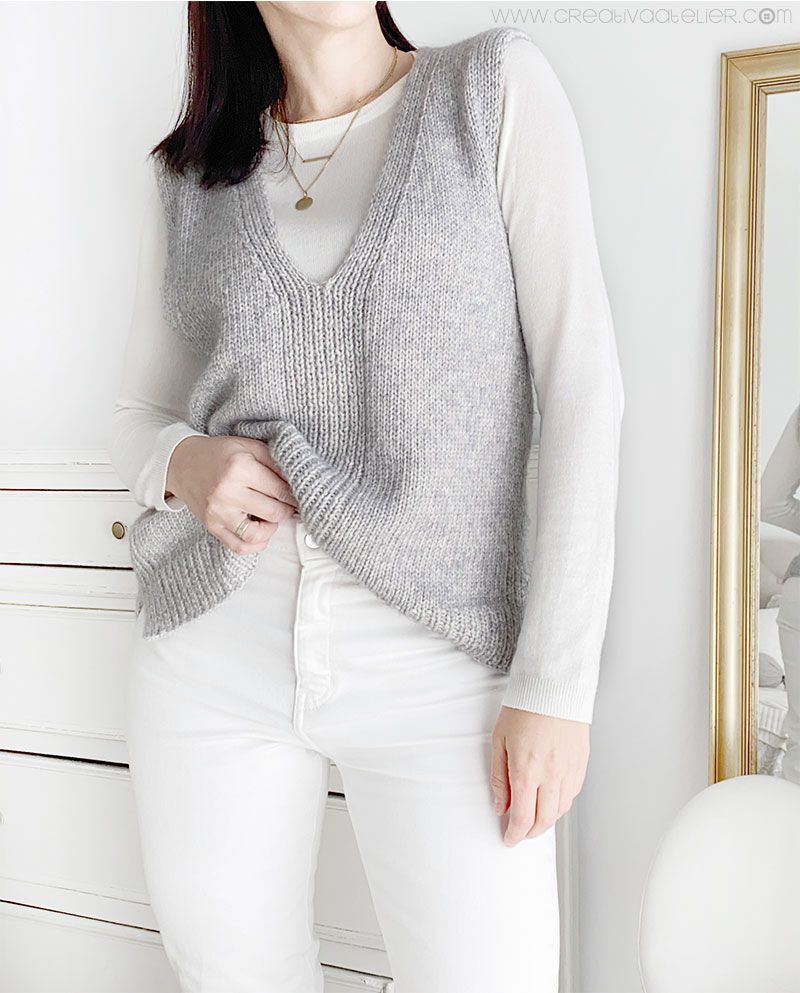

You can also knit your DUO vest to enjoy it in spring/summer. Here is a proposal with KATIA DUOMO quality from the Concept range. A yarn composed of viscose and cotton that results in a light, soft and comfortable garment.
The instructions for knitting the vest in cotton are exactly the same. As you can see, both the neckline and the armhole in this spring/summer version of the vest are deeper than in the wool version. This longer neckline and armhole effect is due to the material we have chosen. Cotton is a heavier fiber than wool, so the fabric stretches lengthwise.
It is advisable that, if you are going to knit your vest using cotton yarn, you work fewer rows in the body of the vest, both in the back and in the front (between 25-30 rows).
Since you will be knitting fewer rows, you will also need less material. In this case, I used 5 balls of 50 grams of cotton.


I hope you liked it and I encourage you to knit your own DUO Reversible Knit Vest in either of the two versions, flat or circular, and of course, if you liked this tutorial and it has served as inspiration, leave me your comment down below, I will love to read your opinion!
If you like, you can share your project on social media with the hashtag #DUOknittedVest, #chalecoDUO and #creativaatelier, so all of us can see your creation. I am sure that we can create more ideas between all of us to customize this basic sweater and give it our unique touch.
A big hug!

Design, images and pattern © 2021 Creativa Atelier by Marta Porcel. All rights reserved
Please, respect the designers and their intellectual property. The pattern is for personal use only. Do not distribute copies in physical or digital formats. Using this pattern to make products for sale, workshops, or any other commercial activity is not permitted. If you have a question about what you can do, please write to me at marta@creativaatelier.com
 PEE-KA-BOO Crochet Diaper Cover – Pattern and Tutorial
Guten Morgen
Gibt es diese schöne Anleitung auch auf deutsch
Vielen Dank
Vielen Dank für dein Interesse.
Derzeit ist die Anleitung nur auf Englisch und Spanisch verfügbar.
bonjour j’aimerai savoir s’il vous plait combien de pelotes pour la taille XL, je vais voir dans mon dressing si je peux le faire MERCI cordialement
Hello! You can find all the materials needed to knit this project in the product description: https://www.creativaatelier.com/producto/duo-knitted-vest-pattern-for-women/?lang=en
I am excited to make this (I plan to at least two separate times in two dif. materials!) The clean simplicity of style really appeals to me. I’m so happy to be subscribed! Also, thank you for letting us buy just the one size, very generous and practical!
Jules
When increasing to 95 stitches on the back do you increase every row or every other row?
Every other row, as you did in the front.😉
I have started working on this vest in the round. Finished the split hem pieces and am on row 117. After completing the pattern on the first hem piece the instructions say to M1R, but if this is at the end of the split hem piece I have no stitch to make one right from? Am I misreading the instructions?
Hi Angela, you should make one new stitch at the edge 😉
Superb, superior instructions for failsafe execution
I’m loving this vest but would really like the v front to be quite a lot higher so you are able to wear it without something underneath to cover the chest area. I would feel much more comfortable with a v that is not so low. Is there an easy way to adjust this pattern to make the V higher? Thanks very much.
Shirley
Ho appena finito questo stupendo gilet, complimenti, istruzioni chiare e semplici. Non vedo l’ora di indossarlo. Grazie
Bonsoir,
Je vais essayer de réaliser ce modèle.
Merci pour les explications
Cordialement
Françoise
Lovely!
Anything similar for men? 🙂
Thank you!