


After the NEO crochet Kimono tutorial came out, a crochet adaptation to the NUR knitted Kimono, many of you were disappointed that it didn’t come with the crochet leggings as part of the package. At first, I hadn’t thought of crocheting the baby leggings, but it’s been requested so much that here you have it by popular demand! 😜
Stitches and techniques
- Chain Stitch – ch
- Single Crochet – sc
- Single crochet working through Back Loops only – scTBL
- Increases – inc
- Decreases – dec
- Slip Stitch –
sl st
Gauge
Before getting started, although you all already know this, I want to mention that we each have our own particular style of crocheting. Some of us crochet more loosely or more tightly, and even depending on the time of day, mood, and many other factors, the crocheting gauge of the same person can vary greatly.
These gauge changes among different people and within the same person in different moments are not too important when crocheting a project that isn’t going to be worn (a bag, a blanket, a cushion) or even a large garment, such as an oversize sweater. However, when we crochet clothes for a baby we need to deal with making sure that we are using the correct gauge in order to obtain the best results and the desired size. Changes in the gauge can result in differences of a few centimeters in the garment and make it so you don’t achieve the size you need.
It’s best if you make a gauge swatch of 16 stitches by 18 rows worked in single crochet before beginning to crochet. This gauge should measure 10×10 cm. If your gauge is larger, try crocheting with a 3.5 mm hook, and if it measures less try with a 4.5 mm hook.
It is very important to get the right gauge for this project to ensure that your finished item is the right size.
Materials for crocheting the NEO leggings
To do this project successfully, the yarn you choose is as important as the gauge. This Crochet Leg Warmer is intended to be crocheted with Katia Alabama quality. You can use another yarn of your choice or convenience that adjusts to the gauge, but personally, I can only guarantee the same results by using the same yarn.
If you decide to crochet this project using a different quality, remember that the 50 gr. Katia Alabama Ball is 105 meters. Keep this in mind to look for a yarn similar in length and weight.
- 2 skeins of 50 gr. from Katia Alabama in color 48-Pink
- 4mm crochet hook and 3 mm one to crochet the waistband (oprional)
- Tapestry needle
Available sizes
Apart from size 1-3 months, which I show in the tutorial, this pattern for Baby Crochet Leggings is also available in Newborn size and 3-6 month size in PDF format, which can be downloaded and printed.
- You can download it and consult it every time you need to without needing to use your mobile connection.
- You can print it to have it at your side as you crochet, and you can make notes, tracking marks, etc…
- You will have all the detailed instructions round by round and stitch by stitch, so you will know in every moment where each increase goes, each decrease, etc., without the hassle of counting it yourself.
- You’ll contribute to keeping up this blog so we’ll be able to keep creating together.
You can look for the size you need by clicking on the following button.
You also have the option to get hold of the complete pattern, which includes the 3 sizes, at a great discount by clicking here.

How to make the NEO crochet Leggings— Size 1-3 months
1. Crochet the right leg of the crochet leg warmer
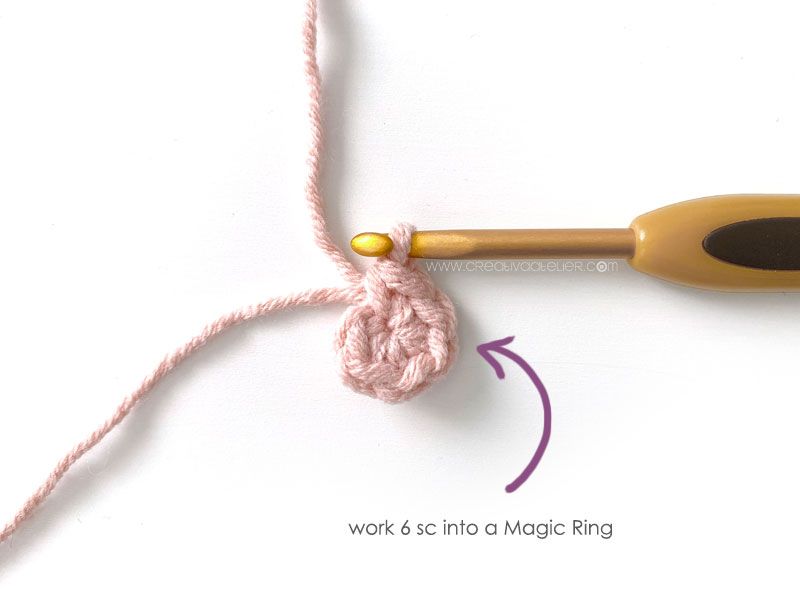
Crochet the toe area and instep
We will start by working 6 single crochet into a magic ring. Afterward, we will increase according to the following diagram. We will work Single Crochet through Back Loops
R1. Work 6 increases (12 sts)
R2. Work *1 scTBL, 1 inc* repeat from *a* until end (18 sts)
R3. Work *2 scTBL, 1 inc* repeat from *a* until end (24 sts)

Work these 24 stitches in scTBL spiral for 8 more rounds.

Crochet the heel area of the baby leggings
Next, we will begin to form the heel of the crochet leggings, working 12 stitches in back and
Turn your work, chain 1, crochet 12 sc. Repeat this row 3 more times

In the following rows, we will crochet some decreases in order to give the heel its rounded form:
R16. ch 1, 4 sc, dec, dec, 4 sc
R17. ch 1, 3 sc, dec, dec, 3 sc
R18. ch 1, 2 sc, dec, dec, 2 sc
R19. ch 1, 1 sc, dec, dec, 1 sc
R20. ch 1, dec, dec.
I recommend that you knit these decreases by skipping a stitch; this way the heel area will come out more even.

From this point, we will go back to crochet a spiral in the ankle area and the rest of the leg up until the inseam.
To resume the spiral crochet, crochet 6 sc in one of the sides until reaching the instep area, crochet 12 scTBL from the instep, and crochet 6 sc from the other side until reaching your marker again. You will have 24 stitches around the ankle area.
Crochet these 24 stitches in a spiral for 2 more rounds.

Once these 2 rounds are finished, you should crochet until you are positioned on the side shown by the photo.

Crochet the leg up to the inseam
In order to shape the leg you should be making increases on the left side of it.
You should crochet an increase on the left side on the odd rounds during first 10 rounds.
Next, we will increase 1 stitch on the left side in every round, in the evens and the odds.
Once the 22 rounds of increases, that form the leg are finished, you should have 40 stitches.
You should crochet your increases so that they go on the left side, just where the garment folds. In this way, you will make sure that they will be seen as little as possible.
Remember that if you prefer to follow the detailed instructions round by round and stitch by stitch, to know exactly where to place the increases, the PDF pattern is available in size Newborn, 1-3 months, and 3-6 months.

Keep this leg to the side, without cutting your yarn. We will continue crocheting with this same thread once we finish the second leg.
2. Crochet the left leg of the NEO leggings
To work the second leg, you should start the other ball of cotton/ wool.
Crochet in the same way as the first leg. Just keep in mind that once you finish the bootie area, you will have to position yourself and crochet the increases on the righthand part of it, so that the legs will be symmetrical.

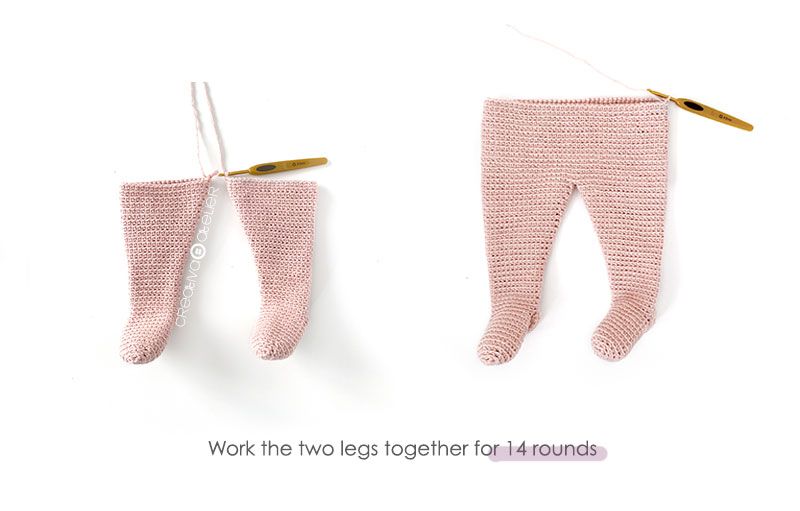
3. Bring together the two legs of the warmer
With your hook placed in the right leg, continue crocheting the stitches of the left side.
Crochet all the stitches of the two legs (80 stitches) for 14 rounds.
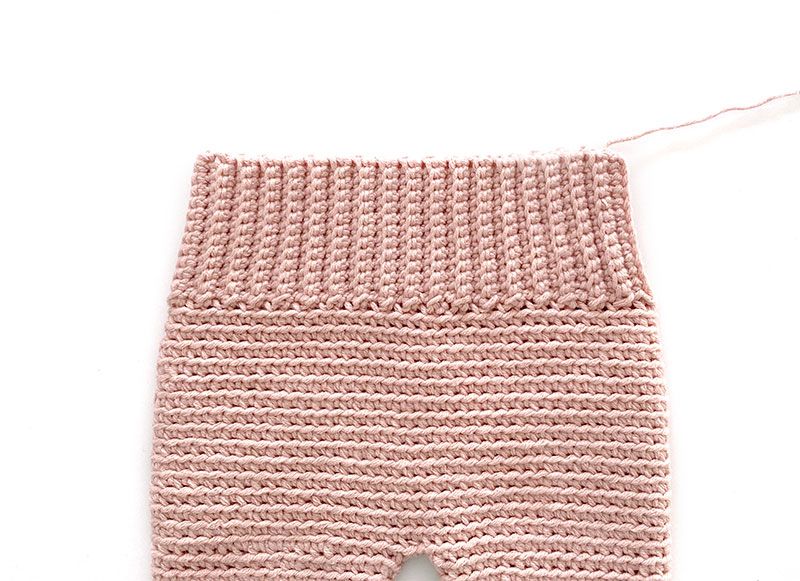
4. Crochet the waistband using ribbing stitch
To make the waistband of our baby crochet leg warmer, we’re going to change the direction of the stitch. Instead of crocheting horizontally as we’ve been doing, we will crochet with a vertical ribbing stitch.
In order to make the waistband tighter, you can use a smaller hook size than what you were using, so that would be a 3mm hook in this case.
From one of the sides of the leggings, chain 15 stitches, and crochet 14 stitches into the chain.
Once you reach the base, crochet two slip stitches (the stitches marked in the photo). Turn your work, skip the two

You can learn how to make this kind of crochet ribbing by watching the following video:
Turn on English subtitles by clicking the CC icon at the bottom right corner of the video
Crochet the ribbing until you have no stitches left on the base. End by sewing the side.

5. Final touches
To finish your baby crochet leggings, you can add a finger-crocheted cord and knot it with a bow.

You can learn how to make this kind of cord by watching the following video:


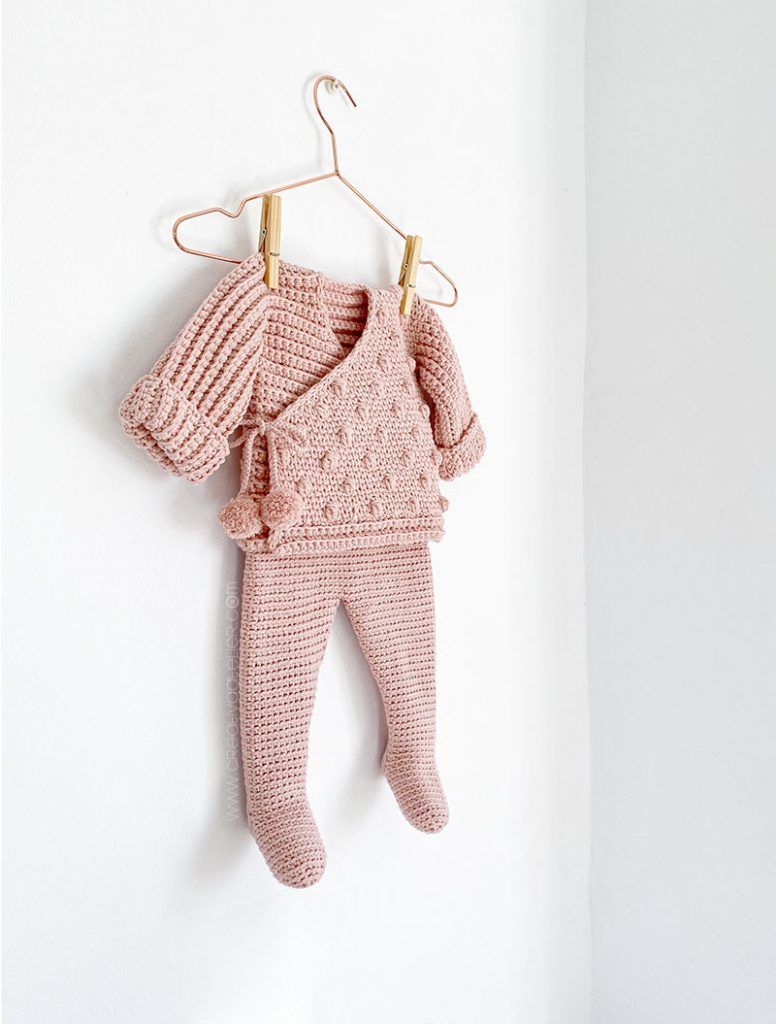
As I mentioned at the beginning, although you can combine this crochet leggings with any other piece on top, it’s intended to go with the NEO Crochet Kimono.


The NEO Kimono tutorial is available for free in size 1-3 months. Remember, you also have the option to get it from size Newborn through size 12-24 months in my online store.
And to make things even easier, you can get the patterns for the whole NEO Set (Kimono+Leggigns) with a discount when you buy them together.
I would love to know your opinion in the comments, and of course, if this tutorial has been useful or inspired you, I hope you will share it with everyone! And if you decide to crochet your own NEO Crochet Baby
Kisses!

Design, images and pattern © 2020 Creativa Atelier by Marta Porcel. All rights reserved
Please, respect the designers and their intellectual property. The pattern is for personal use only. Do not distribute copies in physical or digital formats. Using this pattern to make products for sale, workshops, or any other commercial activity is not permitted. If you have a question about what you can do, please write to me at marta@creativaatelier.com
 Knitted Ruffle Sweater for girl – Pattern & Tutorial
Can the size of this purchased pattern be increased for size 6-9 month
Hi Marta, you are amazing! I really love your patterns. Just a question: in row 17-20 what does ‘cad’ stand for?
Thanks,
Libby 😊
Hi Libby!
It is just a typo! It means chain. cad=ch
Thank you for letting me know!