


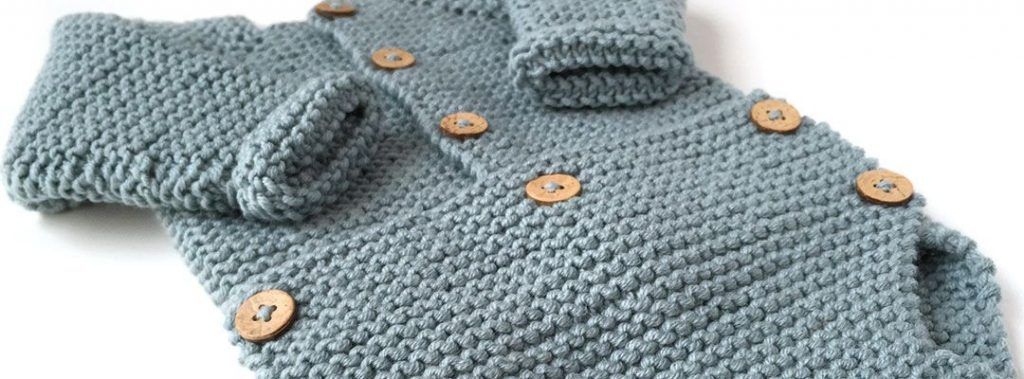
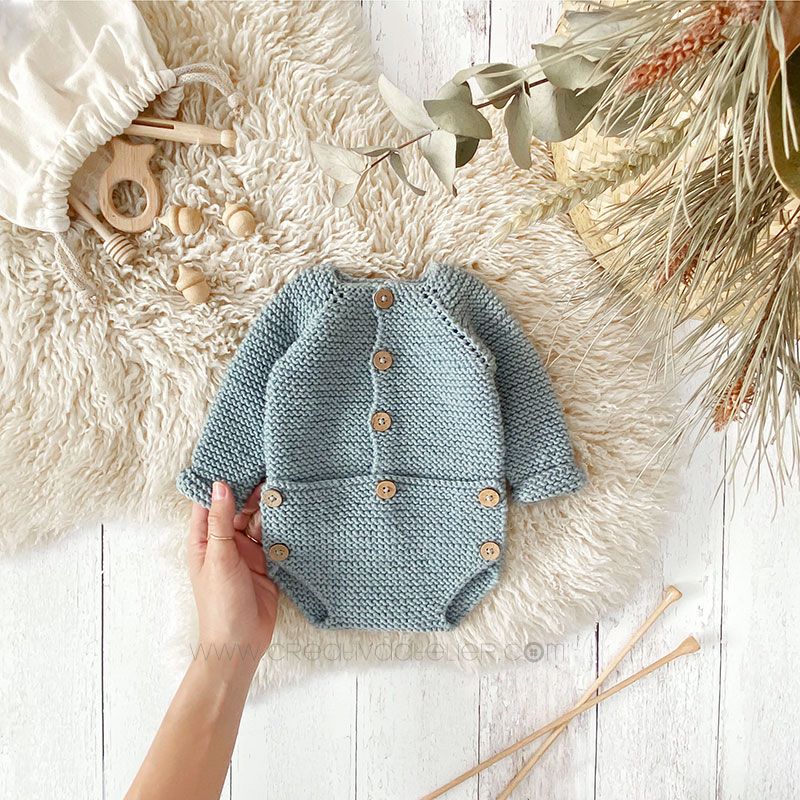

Before the end of the cold weather and start the longed-for spring, I wanted to share with you this tutorial and pattern of a knitted onesie that I think is an ideal option to keep a warm baby in his first days (and the rest of his diaper stage, of course).
When I was pregnant, someone recommended that the best bodies for the baby were those that closed to the side without having to stick their heads in a hole, and when I had to dress my baby for the first time I understood the reason for that recommendation. They are so tiny and delicate that you probably do not know how to lift their head and put it through the hole of a neck at the same time, especially the first-time moms. For this reason, the garments that are open over the front of the baby become the best ally for the first weeks, since it is enough to open the garment, put the baby on top, close it and ready!
As you can see, this knitted baby onesie meets all the requirements!
Warm and comfortable as can be, this Knitted Baby Onesie will be a delightful gift for anyone expecting a baby!
Available sizes of the DUO Reversible Knit Vest
In today’s tutorial I show you how to knit a size 0-1 month. This is the size that you can see in the photos at the end of the post, but this same model is also available in sizes 1-3 months, 3-6 months, 6-12 months and 12-18 months.
Whether you need a different size besides the one in the tutorial or find it easier to knit with detailed instructions row by row, and stitch by stitch, you have the downloadable and printable PDF pattern at a hand! Click on this link or in the following image to choose your size!

As in all my patterns, you have the option to buy separately one size, or get the 5 sizes available at a great discount. Click here to get the 5 sizes of the MUSGO Baby Romper.
The PDF pattern gives you some extra advantages that will make knitting much easier

Downloadable pattern
You can download your pattern and use it whenever you need it without depending on the mobile connection.

Ready to Print
You can print it to always have it by your side while you knit and do annotations, track marks , etc…

Detailed row by row directions
And stitch by stitch! This way, you don’t have to bother doing the math yourself.

CIRCULAR and flat directions
Version for both, circular and flat knitting available in the PDF Pattern.
Materials to make the Knitted Onesie
The needed materials to make our hand Knitted Onesie are:
- 3 balls of 50 grams of yarn for 4 mm needles. I chose Drops Merino Estra Fine Uni Colour in the color- light greyish green-it knits beautifully and the finish is even, light and very soft, ideal for baby garments.
- 4 mm needles. It can be knitted with either straight or circular needles . I’ve used circular needles because, for me, it’s more comfortable, but I use them as if they were straight turning it around every time I finish a row
- 8 wood buttons that give that “natural” touch to the newborn knitted onesie.
Gauge
19 stitches x 40 rows in Garter Stitch
How to knit a baby knitted onesie
1. Knit the body of the onesie
We will begin knitting our baby onesie by the neck, for this, we must cast on 46 stitches and knit 6 rows in garter stitch. I usually like to slip the first stitch because I like how it looks and it makes it easier for me to seam the work.

From here, we will start with the increases to go on forming the front, the sleeves, and the back of the knitted onesie. In this way, we will knit 7 stitches, 1 increase, 1 stitch, 1 increase, 9 stitches, 1 increase, 1 stitch, 1 increase, 10 stitches, 1 increase, 1 stitch, 1 increase, 9 stitches, 1 increase, 1 stitch, 1 increase, 7 stitches.
In the image below I show you how to make these increases:


In the next row, we will start by making a buttonhole, which we must repeat every 20 rows. To do this we will follow the following steps: Knit two stitches, yarn over, knit two stitches together and knit the remaining of the stitches as usual.

We will continue knitting our knitted baby onesie alternating a row of increases with a row where we knit all the stitches. You must keep in mind that as you increase one stitch on each side of the middle stitch, if the row with increases is 7-9-10-9-7, the next row will be 8-11-12-11-8, 9-13-14-13-9, 10-15-16-15-10… and so on until you have increased to 19-33-34-33-19.
Once all the increases have been made, we will separate the stitches of the sleeves from those of the front and back that we will knit at the same time. To separate the stitches of the sleeves from the body, we must knit 21 stitches for the front (to the 19 we must add the increase and the middle stitch) place the 35 stitches on a stitch holder or waste yarn, knit 38 stitches for the back, place 35 stitches on a stitch holder and knit the remaining 21. In this way, we must have 80 stitches in our needle ready to continue knitting.

We knit these 80 stitches for a total of 54 rows, we must keep in mind that like the previous part, in which we made two buttonholes, in this part of the knitted onesie, we must also make two buttonholes (row 46 and row 66.)
Once we have the desired length, in row 87, we will have to bind off 15 stitches, knit 50 stitches and bind off the remaining 15 stitches. Do not be afraid of cutting the yarn at this point and weave in the ends with a tapestry needle.

Remember that if you find it easier to knit with all the instructions for each row and every stitch, you can get your pdf pattern in the tutorial’s size for only 2.99€ or any of the other sizes available for 3.99€.
2. Knit the section for the diaper cover
It will be here where we will begin to knit the back area of the diaper cover decreasing a stitch in the beginning and at the end of each odd row. This way, at the beginning of a row we will knit two stitches and pass one stitch over the other (1 decrease) and knit as usual until there are two stitches remaining that we will knit together to make another decrease. The next row we will knit as usual. We will continue making two decreases every other row until we have 16 middle stitches.

Once we made the decreases, we must follow the same scheme of alternating rows to make increases until we have 38 stitches.
Keep in mind that to for the edge to be even you should first knit a stitch and then make the increase, knit as usual until there is one stitch left, make an increase and knit the last stitch.

To finish the part of the diaper cover of our knitted onesie, we will continue knitting a row of buttonholes (row 145), you must remember that this row is somewhat different to the other buttonhole rows, since it has two buttonholes, one at the beginning of the row and another one at the end; We knit two stitches, yarn over, knit two stitches together, knit 31 stitches, yarn over, knit 2 stitches together, knit the last stitch.
Next, we will to knit 20 rows as usual before the next and last buttonhole row, in which we must make three buttonholes in the following way: We knit 2 stitches, yarn over, knit 2 stitches together, knit 15 stitches, yarn over, knit 2 stitches together, knit 14 stitches, yarn over, knit two stitches together, knit the last stitch.
To finish this part, we knit 3 more rows, bind off all the stitches, cut the yarn leaving a tail and weave in the ends.

3. Knit the onesie sleeves
Cheer up that there is a little left to do! To finish our baby knitted onesie, we just have to knit the sleeves. We must place the stitches that we have on hold onto our needles. If you do not want to complicate much, you can knit all the stitches without decreases until you have reach the length of 15 centimeters. If you prefer that the sleeve is narrowed toward the fist, you will need to make a decrease at the beginning and at the end of every 7 rows.
By the way, if you know how to knit in the round with circular needles, you can make them seamlessly, for the tutorial I prefer to show them this way since it is easily accessible to everyone.


4. We sew the buttons and you’re done!
To finish, all we must do is sew on our precious wood buttons.


All the instructions os this free knitted onesie pattern are due for a size 0-1 month, but the good news is that it is a very easy pattern to adapt to different sizes or thickness of wool, yarn or needles. For this, I recommend that you look at this tutorial where I show you how to calculate the stitches to adapt a knitting pattern, and do it precisely by reference to a pattern that starts by knitting the neck with raglan sleeves, like this pattern.

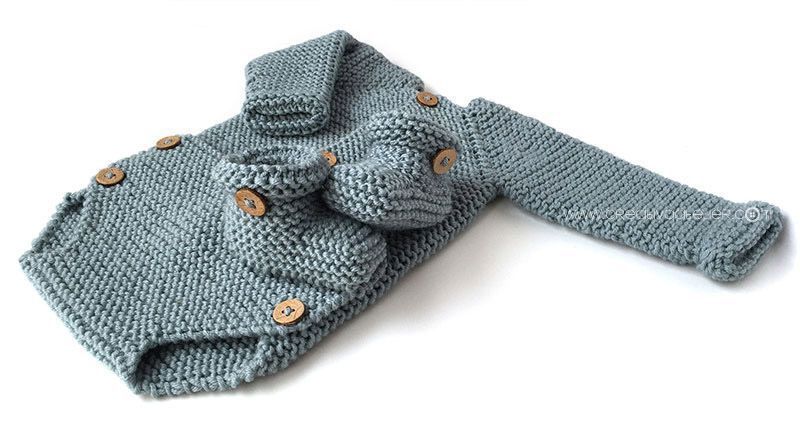
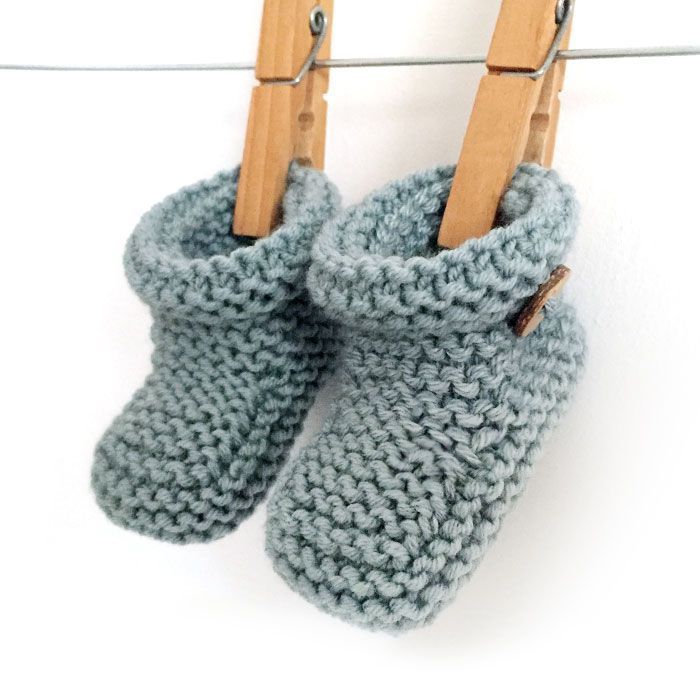
What would you think of finishing the set with these matching booties? I think it would be a perfect gift for a newborn that leaves no-one unmoved!
If you like this type of booties, you can find the step by step tutorial and pattern in this link. It is a simple pattern and very easy to knit, for which you will only need to know how to knit garter stitch and make decreases…so versatile that you can make a lot of different kinds!
If you have enjoyed this newborn knitted onesie pattern and tutorial, please pass our website address along to a friend and do not hesitate to share it or comment below. I love to hear your opinions and I can try to resolve any questions that you may have if you decide to make it.
Kisses!
Design, images and pattern © 2021 Creativa Atelier by Marta Porcel. All rights reserved
Please, respect the designers and their intellectual property. The pattern is for personal use only. Do not distribute copies in physical or digital formats. Using this pattern to make products for sale, workshops, or any other commercial activity is not permitted. If you have a question about what you can do, please write to me at marta@creativaatelier.com
 Knitted Baby Booties – Easy Pattern & Tutorial
Je voudrais faire cette barboteuse body en 3 6mois pour le calcule des mailles en français svp
Hello Pascale! You can find any size you need for the romper in my online store: https://www.creativaatelier.com/producto/musgo-baby-romper-pattern/?lang=en . I also wanted to let you know that all my patterns are available in both Spanish and English.
Can you please email me this pattern , Thanks Mary Ann and the booties please
Hi.. i was looking for help on how to knit the sleeves as I don’t have the circular needle. Can you shed some light to that please?
Dear Marta, THANK YOU FOR THIS WONDERFUL PATTERN. You have gone to so much work for us. Your photos and explanations are just terrific. Now I have finished the knitting, have not yet sewn up the sleeves. Used a yarn I had on hand. (It is a wool and cotton blend, DK weight, made in Spain, brand Katia. Hand wash.) I plan to purchase the DROPS merino that you used, for the next onesie. My knitting is not as neat and lovely as yours. I also just found a mistake in one of the increase seams, but I can live with that. For casting off the sleeves, I had to use US #10 to achieve enough stretch. I have gone to the garnstudio site, and love it, and will purchase from them. Am now beginning the darling booties from your pattern and photos!! Best regards to you, and stay safe as you share so much, in this pandemic.
Hello, what size buttons should I use? Thank you
I absolutely love this patter and have made it all the way thru to the sleeves. However, I have tried “magic loop”, regular circular needles and straight needles and the circle is so tiny I can’t figure out how to actually knit. I have picked up the stitches but can’t figure it out. please advise. thanks…Cheryl
Hello!
I’m sure I’m being dumb but I’m stuck at the separate stitches section. I have knitted the first 21 and put 35 on a stitch holder but am not sure what I need to do next. Do I break the wool to knit the next 38 stitches? Thanks in advance!
I have exactly the same question ! Have you figured it out ??
I was also very confused at this part until I realized we were knitting from the top down and what was going on.
Separate sleeves from body – cont to knit body
– k19, m1, k 1, (this is the front section)= should be 21 sts
– place the next 35 sts on a stitch holder (this is a sleeve)
– k 38 (this is the back section)
– place 35 sts on a stitch holder (this is a sleeve)
– k 21 ( the other half of the front)
DO NOT break yarn, just keep knitting back and forth until the body of the piece is complete. You will come back to the sleeves after. Hope this helps 🙂
How do I do in bigger size 3/6 mths?
Is there a YouTube video or making this knitted onesie? It would be really helpful.
Can you make this cute outfit with cotton yarn instead of merino wool. If so would it still be 3 50g balls? Thank you. It looks so cute and me son and his wife are expecting their first child.
Congrats Karen! Here you can find some cotton alernatives: https://yarnsub.com/yarns/garnstudio/drops_big_merino 😉
I want to make this in a bigger size but your tutorial on how to adapt a knitting pattern is in Spanish and I don’t know how to change it
I just finished the row where you make the button hole. Do I go to the next increase row now, or do I knit a whole normal row and then increase?
“We will continue knitting our knitted baby onesie alternating a row of increases with a row where we knit all the stitches. You must keep in mind that as you increase one stitch on each side of the middle stitch, if the row with increases is 7-9-10-9-7, the next row will be 8-11-12-11-8, 9-13-14-13-9, 10-15-16-15-10… and so on until you have increased to 19-33-34-33-19.“
If you cast on 46 stitches, you cat do the increasing part because there’s not enough stitches to do that many. I’ve tried it multiple time and had to undo all my work because it’s not correct.
Hi Ash! you have to cast on 46 stitches and knit this way: knit 7 stitches, 1 increase, 1 stitch, 1 increase, 9 stitches, 1 increase, 1 stitch, 1 increase, 10 stitches, 1 increase, 1 stitch, 1 increase, 9 stitches, 1 increase, 1 stitch, 1 increase, 7 stitches. Are you doing the increases by inserting the needle through the hole as shown in the pictures? This romper has been knitted several times by many people and nobody reported me this issue… 🤔
I only know one way to increase. Is there multiple ways to increase? I’m confused
I’ve worked it out. I was taught that an increase stitch is different and I know that stitch as a m1 (make one) which doesn’t take from the needle you’re working from, but makes a stitch from the work itself.
Sorry for the misunderstanding.
Just started to make this for a friend. Looks so cute and the pattern seems straight forward. Just a note that when you say to make the button hole, it’s doesn’t say to knit two together after the yarn over. Might be confusing to beginners… looking forward to working on this project!
Hi Ljz! Thank you for your appreciation! I’ve been checking the tutorial because sometimes something gets lost in translation, but this time everything seems to be ok… You can find how to make a buttonhole right after the image where it is graphically show as well, and you can clearly see that two stitches are knitted together.
“In the next row, we will start by making a buttonhole, which we must repeat every 20 rows. To do this we will follow the following steps: Knit two stitches, yarn over, knit two stitches together and knit the remaining of the stitches as usual.”
Maybe I am not looking in the right place and you found the mistake elsewhere in the tutorial…🤔
Best!
Marta
Can you please help with a question
would love to make…says its pri table but there is no pri t nutton????